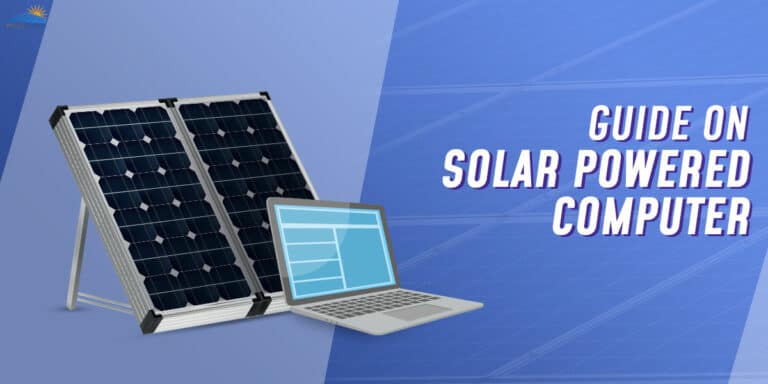
DIY Solar Generator | Easy Method To Make Solar Generator
Solar energy is being incredibly popularized recently – and for good reason as well. Solar energy has a myriad of purposes that you can make use of – all while taking the right step forward in terms of sustainability and energy conservation.
But if you’re stumped as to how to begin generating solar energy for your own personal usage, then we’ve got good news for you. You can now make a solar power generator completely from scratch and all by yourself! So let’s get into the materials of what you need and how to build a solar generator!
- 1. How To Build Your Own DIY Solar Generator
- 2. Why Should You Build A DIY Portable Generator
- 3. Conclusion
How To Build Your Own DIY Solar Generator
Luckily, you don’t need a ton of specialized tools or materials in order to DIY portable solar generator. These materials can be found in your workspace, usually, and are also very easily available in your local hardware store in case you don’t have them. Once you’ve got your materials in place, there are only a few steps you have to perform in order to DIY your very own solar generator!
Step 1: Gather All The Parts
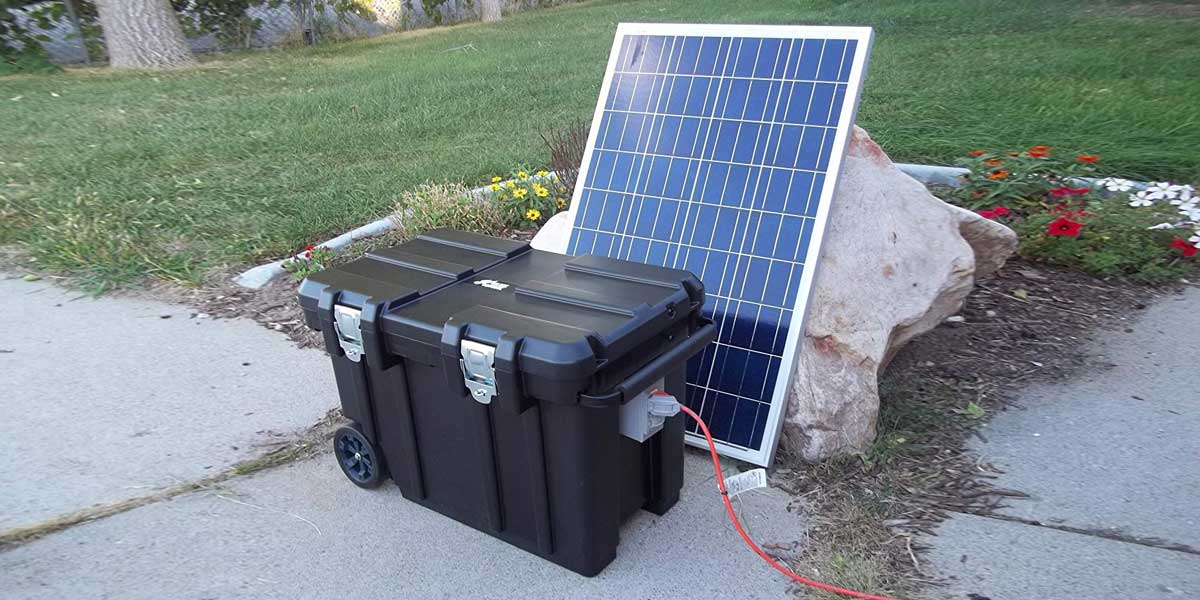
1. Rugged Case
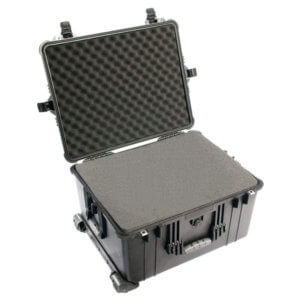
The first thing that you’ll probably need on how to build a 5000-watt solar generator is your rugged case. What this essentially does is make your solar generator portable – so you can just pick this box or case up and relocate to anywhere you want. These are relatively easy to obtain and can be any cases or toolboxes that are extremely sturdy and durable.
They must also have been tested against extreme weather conditions and be absolutely waterproof since you don’t want any part of your solar generator harmed from the exterior. Bonus points if it is sealed against water and is anti-rust – everything that can make your case essentially indestructible.
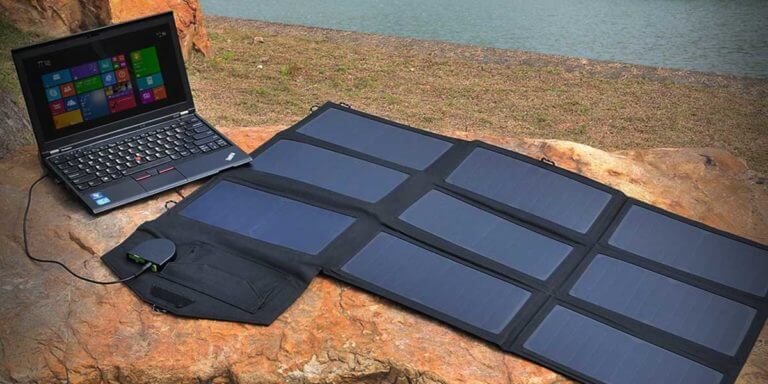
2. Solar Panels
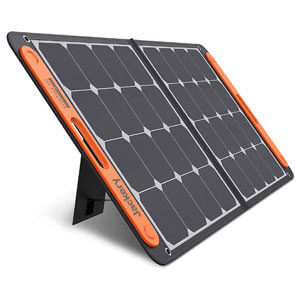
Arguably, these are the most important parts of your DIY solar generator. These solar panels (may be polycrystalline or monocrystalline) are responsible for absorbing sunlight and converting it into heat and energy that you can later utilize. Naturally, since you’re going to be DIY-ing a solar generator, your solar panels have to be front and center of the whole setting.
You also need to ensure that these solar panels are durable and will withstand rough usage. Look into solar panels that are used to rough-handling and have also been tested against rough weathers, since you’re going to have them exposed most of the time. You can check our article on best portable solar panels to choose one for yourself.
Also Read:
3. Battery
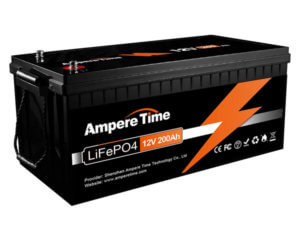
The is perhaps the second most important component of your DIY solar generator. These are immensely crucial since the solar panels collect energy from various sources and then store it in the battery itself. The battery is responsible for you utilizing this energy in various forms later.
Choosing the correct sort of battery can be somewhat difficult, however – but a tip is to think carefully about what you’re going to be utilizing your solar generator for. Lighter usage and heavier usage may call for different batteries, so remember to keep this in mind! Generally, the battery most suited to put in solar generators is the lithium-ion kind.
4. Charge Controller
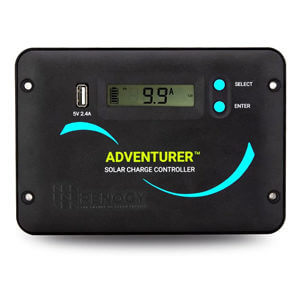
The charge controller in your solar generator might affect the performance of your solar generator immensely. What charge controllers do, essentially, is regulate the number of energy levels flowing from your solar panels down to your battery. Ideally, you want a constant flow so that your battery is not being under-charged or over-charged.
Either of these scenarios may mean that your solar generator may not work at prime efficiency. You can, however, do without a charge controller – but it is highly recommended that you get one just to be sure. You can check our review on the best solar charge controllers to choose one. If you do not have a charge controller when you need one, then your battery will begin to wear down much faster than you’d like.
5. Solar Powered Inverter
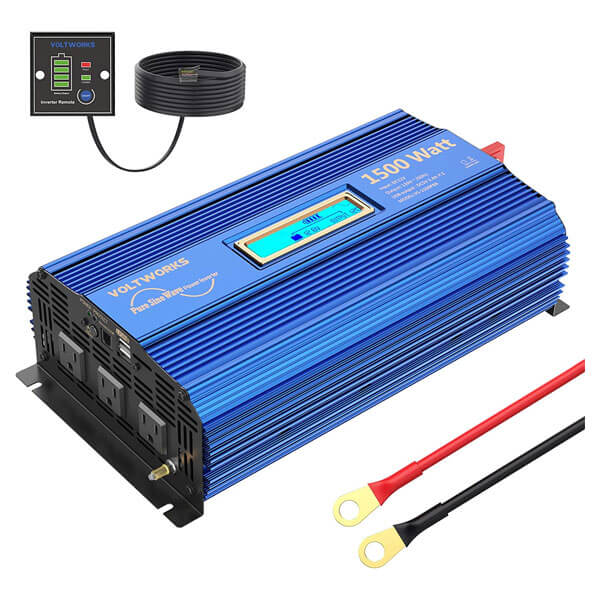
This is an essential component of DIY-ing your solar generator that you absolutely have to get. Since the solar panels directly absorb energy and store it in the battery, this energy cannot be used as it is. It needs to go through conversion and be transformed into AC voltage from the DC voltage that it previously was.
This is where the importance of a solar-powered inverter comes into play. This solar-powered inverter turns that DC voltage into AC voltage – which can then be used for charging various appliances. Invest in a solar-powered inverter (SolarEdge or Enphase) that protects your system against overload and has a higher capacity for conversion as well.
Recommended: How To Reset Solar Inverter?
6. 12 V DC Meter

Yet another tool that is crucial for regulating the energy present in your solar generator, getting a 12V DC meter brings you one step closer to successfully DIY-ing a solar generator. This 12V DC meter shows you how much energy your solar generator has collected and whether you should begin to connect it to power with any of your appliances.
Get a 12V DC meter with an LED screen that is useful for convenient viewing of the collected energy, and can also alert you when there is overloading in power in your generator.
7. Battery Maintainer

To take better care of your battery and ensure that it does not wear down in a short period of time, you should consider investing in a battery maintainer. As the name suggests, the battery is responsible for taking care of your battery when it is not in use.
If your battery is not being utilized for long amounts of time, the battery maintainer essentially sends small amounts of energy to your battery in order to keep it running and functioning even whilst being inactive. So while this is not a necessary part of DIY-ing your own solar generator, it contributes to greater convenience in the future so it’s recommended to invest in one.
Step 2: Calculate The Energy You Need And Test All The Equipment
Now that you’ve finally gathered and picked what materials you will be needing for this process, it is finally time to begin attempting to put your DIY solar generator together. It is important to understand that different appliances require different points of energy for themselves, so it’s best to consult which appliance you’re going to be plugging into the battery of your solar generator in order to power them up.
Most appliances require low energy points, but some such as toaster ovens, coffee machines, and fridges can require higher sources of energy (anywhere from 1000W to 1200W).
As for testing, there are three main components you need to be making sure of when it comes to solar generator usage. This will include your solar panels and charge controllers, your inverter, and lastly the battery maintainer.
For your panels and charge controllers, attempt to connect each separately to the battery in order to test it. Connect them to the (+) and (-) sockets respectively and wait for the battery to light up green to show you that it is indeed connected to power. Repeat the same with the solar panels and place them in a sunny area so they can absorb energy.
Secondly, you need to test your inverter in order to make sure it’s ready to be input into your solar generator. You can do this by taking the cables provided with the inverter and using them to connect the inverter to the battery. Additionally, you will also need to connect a home appliance to ensure if your inverter is indeed functional.
Lastly, you will need to test your battery maintainer to make sure that it is functioning in an optimal manner. To do this, you will need to disconnect your charge controllers and connect your battery maintainer. Make sure that you connect the maintainer to the corresponding poles and that you’re connecting the positive node first.
With this, the testing phase has finally come to an end. If all your components are working and ready, it is time to start building that solar generator.
Step 3: Get the Case Ready
It is important to know exactly how to position your case and how it should be prepped for the rest of the process. Most people tend to ignore the importance of this step, but angling it specifically will help you optimize the solar generator for use. In this step, you will need to think about exactly what components of your solar generator to place where so that you’re not inconvenienced later.
Firstly, get your battery inside the case and position it in such a way so that the 12V DC meter you have is easily accessible to you. This will help you when you want to check the voltage quickly.
At this point, you will also need to review the outlets of the other components you will be connecting to the solar generator. You have to place your appliance outlets, plugs, and other such materials in ways that do not clash with each other.
Outlets that have large backings need to be specially considered here. If any of your appliances have backings that are large, then you have to visualize the spatial properties of the inside of your rugged case. Once you have done this successfully, it is time to drill some holes and connect the DC meter as well as the outlets.
Step 4: Connect all the external components
It is time to finally begin putting your completed solar generator together. In this final step, you will have to connect the external components of your solar generator in order to make it work. The first thing you’re going to want to do is to connect your 12V DC meter to your battery’s terminals – make sure to do it in a way that you can easily view the voltage at all times. After this is done, connect your outlets to the battery as well. Secure them in place properly so that they’re connected well.
Lastly, you will need to connect the most important component – solar panels. You can either choose to connect your solar panels with the help of plugs that can connect your panels to your battery quickly, or you can opt for the more long-lasting solution of connecting them as you did with your other components. Once you do this step successfully, your solar generator will be ready to be used.
Step 5: Testing The Solar Generator
So how do you know if the solar generator you made for yourself is actually functional? Well, there’s only one way to know this – test out your solar generator by placing your solar panels in the sun. If the wires connecting your panel and battery are long, then you can attempt to put just your solar panels out in the area which is receiving an abundance of sunlight. You should ensure that the wires connecting the solar panels and the battery aren’t loose as they can lead to potential risks.
This way, you can tell whether or not your solar generator is fully functional or not. Once your solar panels get the adequate energy they need, you can view the voltage on your DC meter. Leave your solar panels out in the sun so they can charge your battery completely.
Step 6: Use The Solar Generator
Now that you’ve tested your solar power generator and made sure that it is fully functioning, you can finally begin to use it to its full capacity! Essentially, at this stage, you will need to connect whichever appliances you need to charge into the charged-up battery. You can briefly disconnect the battery from the solar panels at this juncture once it has been fully charged.
Connect your appliances wherever you have placed the outlet in your solar power generator and begin to use your solar power generator for good. For the first few uses, however, you will need to oversee exactly how much time it takes to charge which appliance so you can get a brief idea of the charging times.
Why Should You Build A DIY Portable Generator
There is a myriad of reasons why you should be building your own DIY portable generator.
1. Easily repairable
As you might have observed while building your DIY portable solar generator, they’re incredibly easy and don’t require specialized skills to build. Similarly, repairing them becomes a piece of cake and it’s almost as easy as building them.
2. Better than Readymade Generators
Surprisingly, to build your own solar generator might actually be a better decision than the expensive ones that are available for purchase. You can refer our article on best solar generators to choose one for yourself. Since you’re the one customizing them, build your solar generator according to your needs – install components that have higher output depending on your usage.
3. Saves money
Solar generators available for purchase are not only slightly less optimal than the ones you make by yourself but also cost insanely high. To avoid such an extreme budget, the safest bet is to get your own components and DIY your solar generator.
4. Customize it according to your needs
Perhaps the best part of building your own DIY solar generator is that you can call the shots of what components you need to be including in it. If you need extra customizations such as floodlights or higher voltage output, then you can make the necessary changes yourself.
5. Better than other Generators
Building your own homemade solar-powered generator can be more environmentally friendly and safer than other fuel-powered or gas-powered alternatives. Both of these can have harmful fumes and might just be inconvenient, making solar-powered generators the better option.
Conclusion
Keeping in mind the numerous benefits of owning a solar generator, without further ado, get your hands on the required components and get to making the best DIY solar generator. Take a step towards sustainability in the most convenient and cheapest way possible – all you need is some time and the right tools to make it happen.