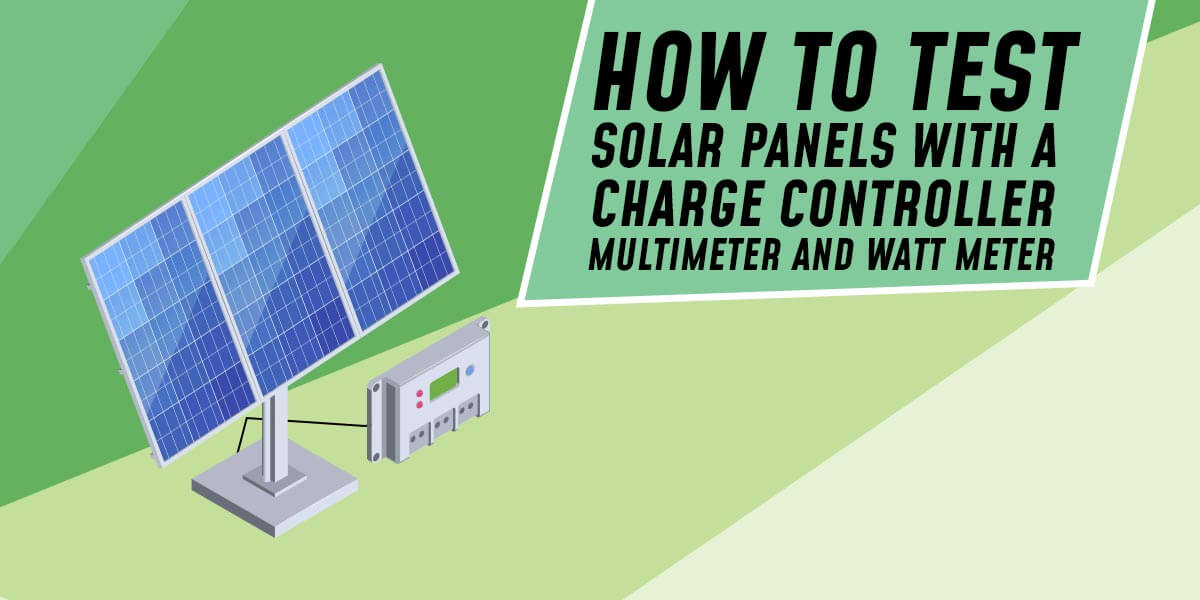
How to Test Solar Panels with a Charge Controller,Multimeter
Solar Energy offers several advantages and disadvantages. And a solar panel system, for example, may use direct sunlight to generate electric currents. Your power cost will most likely reduce once you install solar panels. Solar panel testing is the most exact method for determining how much electricity your solar power system generates. Solar panel testing is a simple operation that may keep you informed of your solar panels’ effectiveness.
Considering that the yield and efficiency of your solar panels will have a significant influence on the total power capabilities of your solar power system, many individuals test their solar panels regularly. In this simple solar panel guide, you will know how to check solar panel output and how to test solar panels.
- 1. How to Test a Solar Panel Output with a Charge Controller
- 2. How to Test a Solar Panel Output with a Watt Meter
- 3. How to Test Solar Panels with Multimeter
- 4. Measure the Open Circuit Voltage of the Solar Panel
- 5. Measure the Short Circuit Current of the Solar Panel
- 6. Measure the Operating Current of Solar Panel
- 7. Conclusion
How to Test a Solar Panel Output with a Charge Controller
A solar charge controller is included with some solar panel systems. The charge controller is simply a voltage and current regulator for solar power. There are two types of most used charged controller to pick from : MPPT or PWM charge controller. MPPT or PWM charge controller are often utilized in off-grid solar systems to produce the highest possible power.
This charge controller is intended to keep electricity flowing without overloading the battery. A solar charge controller is only necessary for battery-powered systems. These are frequently unnecessary for smaller solar-powered systems. Let’s check how to test solar panel output with a charge controller.
Once connected, you can measure:
- PV voltage
- PV current
- Power output in watts
What You Need
- Solar charge controller ( Opt for best charge controller available in the market) that either have: displays PV voltage and PV current or has Bluetooth
- Battery
Step 1: Connect the correct connections to the solar charge controller, making that the positive lead is on the positive side and the negative lead is on the negative side.
Step 2: The meter should be set at -10 amps. Next, Connect the solar panel and the solar charge controller, and the batteries after everything is in position.
Step 3: Connect the battery to the solar charge controller. Next, unplug the positive connection from the battery and attach the meter to the charge controller’s positive side.
Step 4: Connect the meter’s negative connector to the battery’s positive terminal for the next step. The current flowing between the solar panel and the charging connector will be displayed through this connection.
Step 5: Again, alligator clips may be required to receive current.
How to Test a Solar Panel Output with a Watt Meter
A power meter is another name for a Watt meter. These are reasonably priced on Amazon. To measure voltage, current, wattage, and other characteristics, attach one between your solar panel and the charge controller. Check out how to do solar panel testing with a watt meter.
What You Need
- Solar charge controller ( MPPT or PWM)
- Battery
- Watt meter
Step 1: Connect the battery to the solar charge controller.
Step 2: Connect the charge controller adapter wires to the watt meter. Crimp one end of the MC4 connectors and connect a piece of wire to the other. If you may not want to mess with crimping wire connectors, the watt meter with MC4 connectors is an option. Connect the adapter wires to the charging controller (using a watt meter).
Step 3: Connect the charge controller adapter wires to the solar panel.
Step 4: Place the solar panel directly in the sun. When you do this, the watt meter will switch on and begin monitoring the power output of your solar panel.
The meter also monitors total watt-hours, a valuable indicator for determining how much electricity your solar panel produces in a given day.
This watt meter switches off when the solar panel stops producing power. When turned back on, all of the totals will be reset to zero. You may acquire a charge controller with Bluetooth if you wish to track the energy production of your solar panels over time.
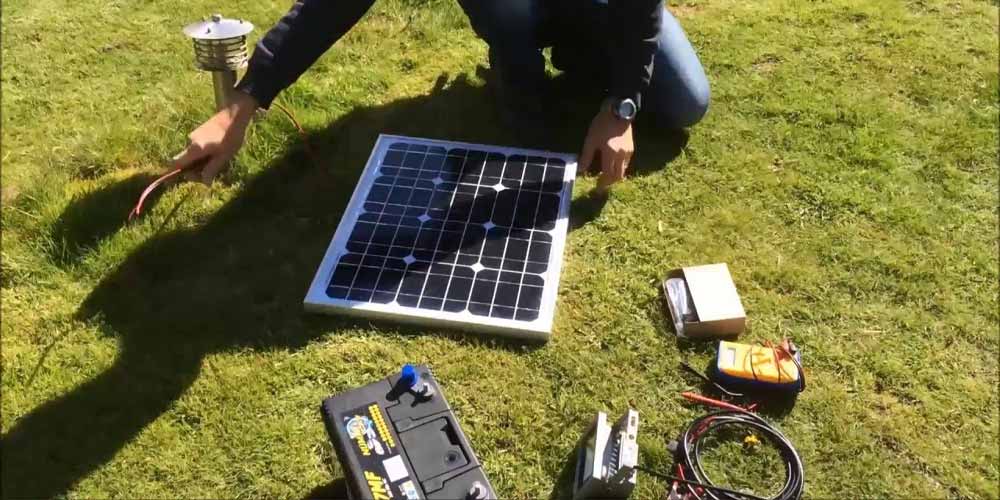
How to Test Solar Panels with Multimeter
Understanding how to test a solar panel with a multimeter is critical. You might harm your panels if you use a multimeter incorrectly. Furthermore, solar panel testing is the sole way to determine whether or not you have obtained high-quality panels.
Step 1: Find the converter box.
The converter box is situated on the solar panel’s backside. After you’ve found the converter box, you’ll need to remove the lid. After removing the cover, you’ll be able to examine the connections within.
Step 2: Make a list of positive and negative connections
It would help if you recognized both the good and negative connections. After determining positive and negative connections, place your panel in direct sunshine. To do this, angle the panel to receive as much sunshine as possible.
Step 3: Switch the multimeter to DC
Make sure your measurement is larger than the volts that the solar panel is rated for. Setup your multimeter to read higher if your panel is rated for 20 volts. If you do this, you can be guaranteed to get an accurate reading. To determine the voltage rating of your panel, look inside the converter box, where it is usually marked.
Step 4: Join the Alligator Clips
The red lead from your alligator clips must be connected to the positive side. Connect the black lead to the negative after that. After you complete this step, your meter should provide an accurate reading of the voltages produced by your panel. New solar panels should provide a voltage close to the rated value.
If the solar panel you’re evaluating is old, you can get a lower result. This is not uncommon. Make sure the multimeter is switched off before detaching the alligator clips.
Let’s see how you can measure open circuit solar panel voltage and current output and operating current of solar panel with the help of a multimeter.
Measure the Open Circuit Voltage of the Solar Panel
Step 1: On the back of your solar panel’s specs label, look for the open circuit voltage (Voc). Save this number for later use.
Step 2: Prepare your multimeter for DC volt measurements. To do so, connect the black probe to your multimeter’s COM terminal. Connect the red probe to a voltage terminal.
Step 3: Set your multimeter to DC voltage and the appropriate voltage range if it isn’t auto-ranging. A solid line over a dotted line adjacent to the letter V denotes it.
Step 4: Place your solar panel outside in direct sunshine. Aim it toward the sun for the greatest effects.
Step 5: Determine the positive and negative solar panel wiring locations. The positive cable usually has the male MC4 connection and the surrounding red ring.
Step 6: Connect your multimeter’s red probe to the metal pin inside the positive MC4 connection. Connect the black probe to the metal pin inside the negative MC4 connection.
Step 7: Compare your multimeter measurement to the open circuit voltage (Voc) on your panel’s back. Reverse the probes and take another test if your voltage reading is negative.
The reading on your multimeter should be close to the open circuit voltage listed on the back of the panel. It does not, however, have to be identical.
If they’re similar, your panel appears to be in decent shape thus far.
Step 8: If the voltage you measure is much less than the Voc, try the following before retaking the measurement:
- Check that it’s a sunny day, that the panel is in direct sunlight, and that it’s tilted toward the sun.
- Make certain that no component of the solar panel is shadowed.
- The solar panel should be cleaned.
Your solar panel may be damaged if your measurement is still off.
Measure the Short Circuit Current of the Solar Panel
Step 1: Locate the short circuit current (Isc) on the panel’s specifications label. Keep this number handy for later.
Step 2: Prepare your multimeter for amp measurements. Move the red probe to the amperage terminal to do this. Set the multimeter to the amp setting (A), selecting the appropriate limit if it is not auto-ranging.
Ensure your multimeter’s fuse size is bigger than your panel’s short circuit current. Typically, the fuse size is displayed above the amperage terminal.
Step 3: Place your panel in direct sunshine outside. Connect the red probe of your multimeter to the metal pin inside the positive MC4 connector. Connect the black probe to the metal pin inside the MC4 connection’s negative terminal.
When you finish the connection, there will most likely be a spark. This is typical.
Compare the current reading on your multimeter to the short circuit current (Isc) indicated on the back of your panel.
Step 4: The short circuit current you are measuring should be close to the one shown on the back of the panel. However, it does not have to be the same. If your measurement matches the Isc given on the back of the panel, that’s fantastic! Your panel is operational.
Most consumers need to measure open circuit voltage and short circuit current to ensure that their solar panel is in excellent operating condition. You are free to discontinue testing at any time. If you wish to go further, several methods exist for testing a solar panel with and without a multimeter. Continue reading to find out how.
Measure the Operating Current of Solar Panel
Step 1: Connect the battery to the solar charge controller.
Step 2: Connect the charging controller using adapter cables.
Step 3: Connect the negative solar cable to the negative adapter cable. Remove the positive solar cable.
Step 4: Prepare the multimeter to measure amps. To prevent the solar panel from generating any power, cover it with a towel or place it face down on the ground.
Step 5: Connect the red multimeter probe to the metal pin of the male MC4 connection (connected to the solar panel).
Step 6: Touch the black multimeter probe to the metal pin on the female MC4 connector to complete the connection (linked to the charge controller).
Step 7: Remove the towel from your solar panel (or flip it face up) and check the amperage with your multimeter to see how much current your solar panel produces.
The operational PV can also be measured using a charge controller.
Conclusion
Testing your solar panels is an important step towards moving entirely off the grid. Before you switch on and start producing power, you’ll need to know how the solar panels function in their intended installation position. This will help you optimize the performance and output of your solar panels.
You want to obtain the maximum capacity factor possible to guarantee you receive the most bang for your buck with your solar system. This easy step-by-step instruction will assist you in testing solar panels with a multimeter.