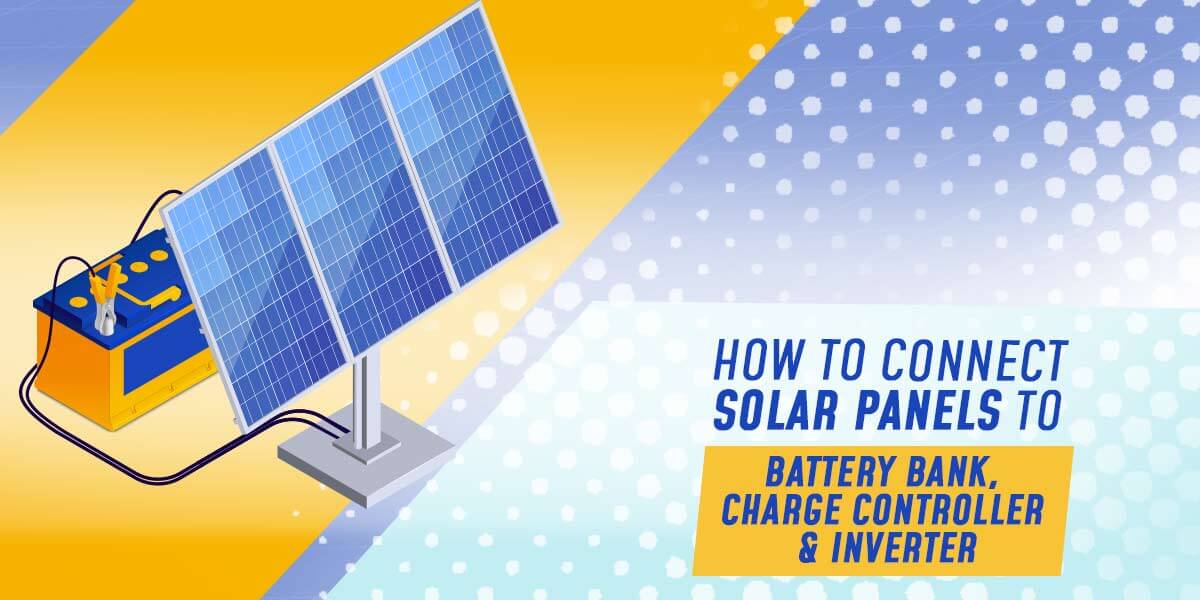
How to Connect Solar Panels to Battery Bank / Charge Controller & Inverter
As the world faces an imminent threat of depletion of conventional fuels, people and governments worldwide are looking for alternative energy sources. One such source that is available to us all the time and relatively easy to use is solar energy.
Anyone can access solar energy, and it is becoming a trend to use solar energy for houses and build an off-grid renewable energy system. Previously we have demonstrated how to connect solar panels to two batteries. But what if you want to know how to connect solar panels to a single battery bank.
If you wonder how to connect the solar panels to a battery and inverter or connect solar panels to a charge controller, also solar panels are connected in parallel or series manner in this article will demonstrate how to do it in easy steps. The process is fairly simple and can be scaled easily to power a whole house.
What You Need
To get started and complete this little project, you will need the obvious things like a battery bank, solar panels, a charge controller, inverter. You will need these things listed below.
- Wirings
- Screws
- Mounting materials and mounting brackets
- 2 AWG cable
- Drill
- Cable cutters
- Electrical tapes
- Crescent Wrench
It is important to understand the wiring diagram before going into all the steps and the actual “doing it” part.

Please note that the battery is not directly connected to the solar panels. Instead, it is connected to a solar charge controller connected to the solar panels. This is done to protect the battery pack.
How to Connect Solar Panel to Charge Controller
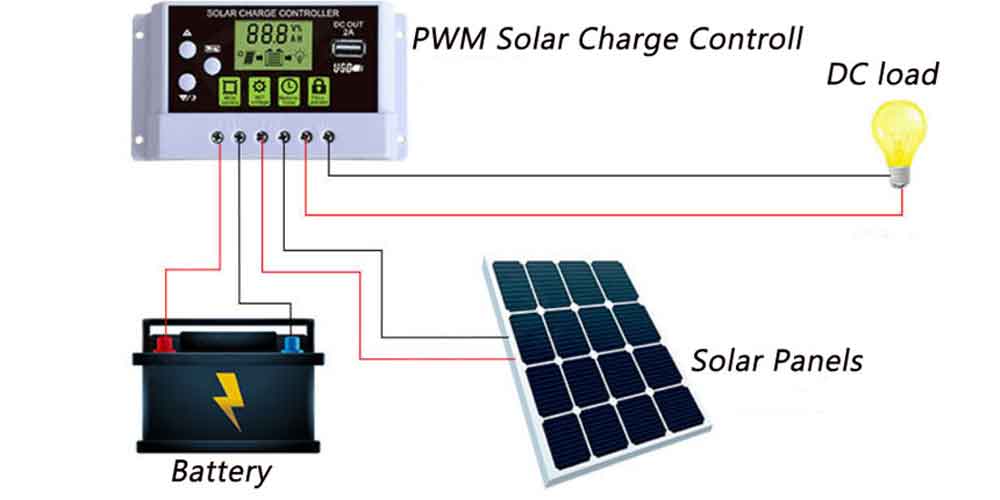
Solar charge connectors are devices that help regulate the current that comes from the solar panel, usually PWM and MPPT are two charge controllers are used while installing A solar panel connection. Charge controller must be rated to handle the solar panel’s input’s proper amount of voltage, wattage, and current.
Now that you know the basic layout of the connection, we will first connect the solar panel to the charge controller.
Step 1:Check if your charge controller is rated to handle the maximum solar input.
- It is better to have headroom and get a charge controller than can handle more than the maximum solar input.
Step 2: Find the polarity of your charge controller and solar panel.
- Carefully note the “positive” and “negative” on your charge controller and solar panel, as connecting the wrong polarity may damage the system.
Step 3: Connect the charge controller to the solar panel with wires.
- Connect the positive solar terminal to the positive solar terminal on the charge controller with the help of an MC4 cable. Connect the MC4 inline fuse and then the MC4 adapter cable for the positive side.
- Similarly, connect the negatives of both the components but without the fuse.
Well, there you go! You have successfully connected the charge controller to your solar panel.
How to Connect Solar Panel to Battery Bank
You already know that battery isn’t directly connected to the solar panels. Instead, the battery is connected to the charge controller. Now that a part of the charge controller and solar panels are connected, let’s see how to connect the solar panel to the battery and complete the rest of the connection.
Step 1: See if the area and components are safe.
- Before connecting any wires, check for any damage or rust on the terminals of the battery. It is also advisable to keep the solar panel away from the sun to avoid any current flow. Please disconnect them altogether.
Step 2: Remove the ring terminal and connect the wires.
- First, connect the negative of the battery terminal to the negative battery terminal on the charge controller without any fuse.
- Next, connect the positive of the battery terminal to the positive battery terminal on the charge controller.
Step 3: Secure the connection.
- Secure the connection between the charge controller and battery by tightening the battery rings back on the battery’s terminals.
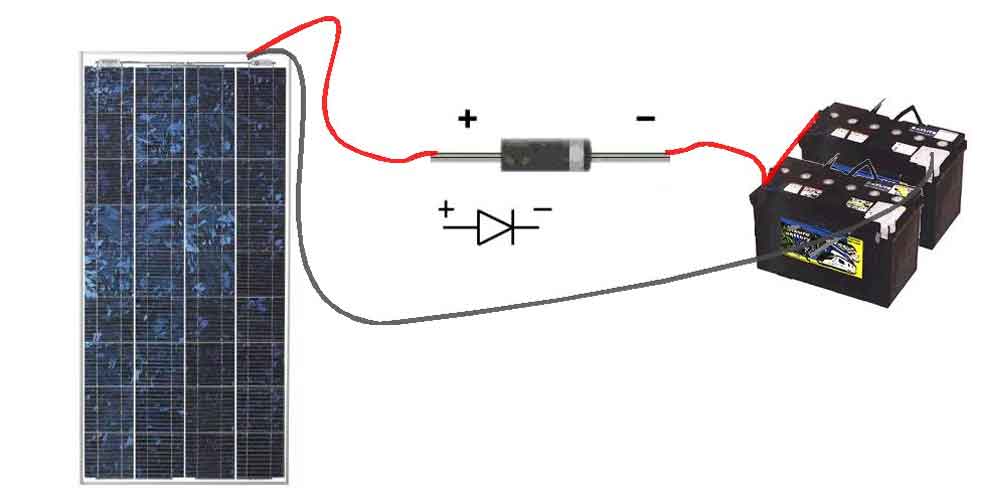
There you go! You have established a complete connection between your solar panel and battery. Please note that some solar panels come with built-in charge controllers. You can directly connect the battery to the solar panel in such cases.
How to Connect Solar Panels to Inverter
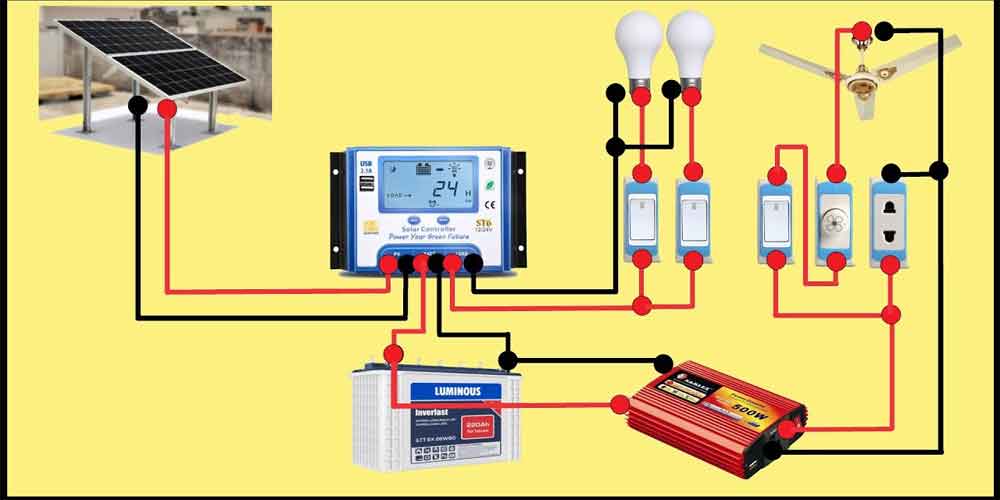
Inverters are needed if you plan to use AC (Alternate Current) to power any home appliances or anything that needs AC. An inverter is an optional choice, and it is not mandatory to produce usable electricity from your solar panels. Let’s see how you can connect the solar panel to the inverter.
Step 1: Remove the battery rings from the battery terminal
- Before establishing any further connection, remove the battery rings from the terminals carefully while ensuring that no electricity flows to the battery.
Step 2: Match the positive and negatives of the inverter
- This step is straightforward. Connect a wire from the battery’s positive terminal to the positive of the inverter terminal.
- Similarly, connect the battery’s negative terminal to the negative terminal of the inverter.
Step 3: Test it.
- Make any connections that you removed to avoid the current flow and place the solar panel under the sun at a proper angle. The battery should start charging if the established connection is right. Connect any appliance to the inverter to check if it is running.
General Safety Measures to Take Care of
It is really important to keep safety in mind while working on such projects.
- Wear insulating boots and gloves to avoid any fatal electrical shocks or mishaps.
- While making connections, make sure the connection is not complete, and there is no electricity flowing through.
- Handle the batteries with care, and don’t store the batteries haphazardly.
- Wear eye protection while working with batteries or solar panels.
- Do not touch wires or terminal contacts without wearing gloves or insulating materials.
- Charge the battery in a well-ventilated area to avoid overheating.
- Do not allow the vents of the battery to be blocked.
Closing thoughts
There you go, you are all done! That was easy, right. We hope that this simple guide has helped you take your first step toward building a sustainable energy source. Even with lower output solar panels, you can power simple gadgets and electrical appliances like charging your bicycle or phone, lighting up your room, etc.
You can scale this same connection to bigger projects if you plan to produce more electricity. You need to use batteries with bigger capacities and solar panels to produce more electricity. Ensure that the components and wire you use are rated for appropriate wattages, current, and voltage. Remember that, while it can be a fun project, you save the environment by choosing alternative sources to generate power.
Solar energy is a free energy source, and no one is getting upset about taking sunlight! Go ahead and power something in your house with this simple solar electricity guide.