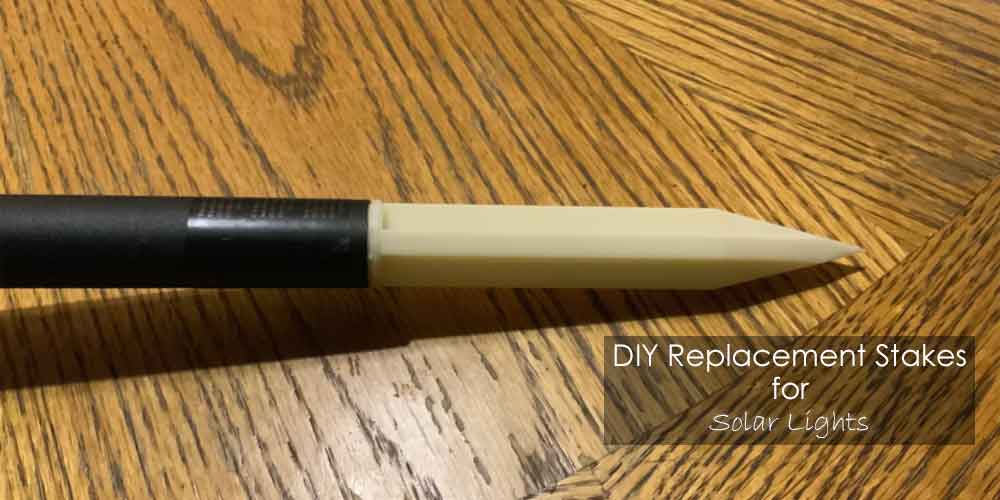
How to Make Replacement Stakes For Solar Lights | DIY Guide
Installing solar lights like solar uplights or solar driveway lights in the outside area can be a rather easy task even for people who have never done it before. Outdoor solar lights are a great option for backyard ideas on a budget, especially if you need to illuminate a road or walkway, or if you want to attract attention to a garden feature at night.
Solar lights for your yard are inexpensive and simple to set up. Installing solar lights is, for the most part, a simple backyard DIY. However, as with all other things, there can be some shortcomings associated with installing solar lights too.
Often times, the stakes tend to give up before the solar lights themselves. In cases like these, you might wonder about making replacement stakes for your solar lights. Do you have to be an ardent DIYer to make replacement stakes for solar lights? Absolutely not!
You can even make solar lights from scratch entirely, but that’s not what we’re going to be discussing today. Just the stakes for now. Here’s how to make replacement replacement stakes for solar lights.
Why Would You Want to Replace Solar Light Stakes?
Solar lights ground stakes may sometimes break suddenly. There is no need to worry, it’s very common; most lights come with cheap stakes that fail after a year or two.
All you have to do is replace the old stakes with new ones that are more sturdy. There may very well be other reasons of solar lights not working too.
Installing outdoor lights may significantly increase the value of any home. As a result, most homeowners may find that switching to solar lighting systems is a wise decision.
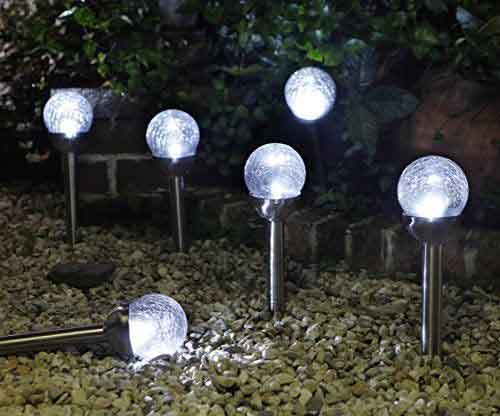
Solar stakes are frequently designed to provide homeowners more options. You can easily install them in the ground or on top of fences.
The good news is that they come in a variety of styles, allowing you to select the one that best suits the site where you intend to install them. The best solar light stakes are usually available in a variety of colors.
How to Make Replacement Stakes for Solar Lights
What You’ll Need
- A wood dowel
- Rebar
- A cutting tool
- A hammer
Procedure
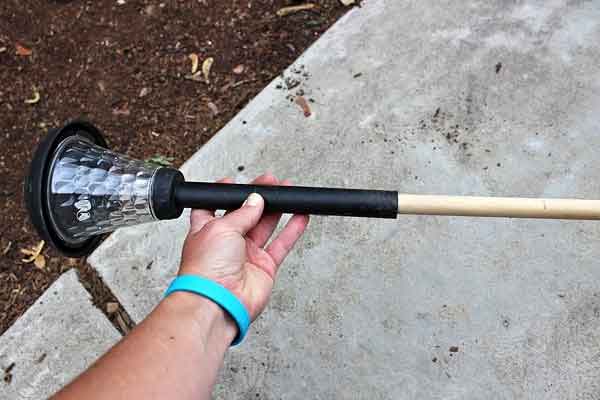
- Making replacement stakes for outdoor solar lights can be a rather easy task and be carried out smoothly. Cut the dowel into pieces in step one. You can use a 5/8-inch wood dowel for this project. The dowel was then chopped into 9- to 10-inch segments.
- Please keep in mind that using wood for your stakes will not be a long-term solution because wood does not last forever. If you want something that will survive longer, some hardware and online businesses sell 12-inch long rebar, which would make more promising of a replacement.
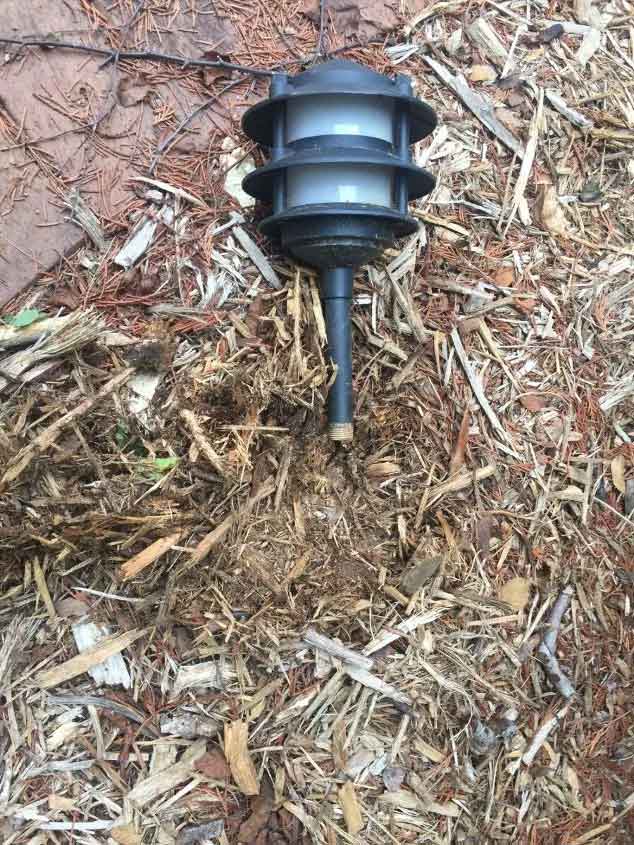
- Next, drive the dowel into the ground using a hammer. After cutting the dowel, hammer it halfway into the ground with a hammer. Then double-check that the dowel is secure.
- Now put the dowel in place of the old stake. Remove the old and broken stake from the solar light from there. Then carefully placed the dowel in its proper location. It will then perform as a straight and steady pole for your outdoor solar lights from the moment you insert it.
Safety Measures
When installing or changing stakes, if the soil is not adequately prepared and the stakes are pushed too hard, the solar lights are more likely to be damaged. If the stakes don’t slide into the soil smoothly, consider soaking it and breaking it up with a garden fork or shovel.
When it comes to installing outdoor solar lights in your yard, the most crucial factor to consider is placement. If you’re lighting a path, keep the lights close together so it’s easier to see where you’re going, especially if the path is twisting. If you wish to illuminate a garden feature, make sure the lights are close enough to cast a sufficient quantity of light on it.
You should also think about if the positioning of your lights would make it difficult to maintain or use your lawn. You don’t want to put your lights in places where they’ll be tough to mow around or where they’ll get run over.
Additional Tips for Fixing Solar Light Stakes
Soil Preparation- The majority of solar-powered lights come with stakes that can be buried in the ground. Digging will be required if you’re installing a set of solar fixtures each with their own solar panel. Furthermore, because the solar panel must be placed in a sunny location, this may limit installation alternatives.
Soil preparation may be required if the ground where the solar lights will be installed is compacted and hard. This is to ensure that the stakes are properly and firmly secured in order to penetrate the ground. Start by softening the soil by watering it carefully.
You can speed up the procedure by using a garden fork or shovel. The ground should be suitable for embedding the stakes.
Place the solar fixtures carefully and in the proper location- The location of the solar lighting device is the most important element to consider when installing solar outdoor lights. It would be beneficial if you considered the purpose for which the solar lighting systems would be used.
If you want to light up your pathway, for example, you might want to place the solar lights evenly spaced. This ensures that it is simple to see where the path is, especially if it is winding.
If you want to light up a garden feature, though, you’ll need to place the solar lights close enough to it. They would be able to emit a sufficient amount of light as a result of this.
Then, charge the solar-powered lights. The first thing you’ll need to do is charge the solar-powered lights before putting them up. To fully charge an outdoor solar light, it usually takes 12 to 14 hours of sunlight. As you can see, this must be done before installing them, as stated in the user manual that comes with the kit when you purchase it.
If necessary, you can charge the solar-powered fixtures for a few days. You can leave them in a sunny spot outside. This method allows you to maximize the charging efficiency of the batteries before installing the solar lights where you want them.
How to Keep Solar Lights from Falling Over?
When a professional landscaping crew installs new planting beds, they normally bring in four people “-6″ of new planting soil (bed prep) and a 2” layer of mulch If the stake that comes with the low voltage lighting unit is just 6 inches long, “The light will not be secure in this soil for long. Installing the unit with the deeper stake will allow it to be secured in more compact soil.
Furthermore, we always run our low voltage electrical wiring through conduit and into the open stake, resulting in a more stable unit. When you change plant material or add additional plants to your garden, run your low voltage wiring via conduit to avoid inadvertently severing the wires.
Using the wrong wire diameter, or wire gauge, will result in systems being under voltage, tripping, and failing. Wire should also be buried at least 6-8 inches underground, according to our recommendations.
Closing Thoughts
Installing solar lights outside can be a low-cost and simple way to improve the look of your outdoor space. They may provide additional illumination where it’s needed, emphasize your favorite landscape features, and require no energy and no upkeep because they’re powered by the sun.
Because of the numerous advantages that solar lighting systems may provide, an increasing number of homes are turning to them. They are simple to use and require little upkeep.
It’s a breeze to set them up. You can place them in the sun-drenched soil and have them work automatically at dusk. Without a doubt, the best stakes for solar lights allow you to take advantage of the solar lights.
These solar lighting gadgets are often inexpensive and simple to use. I hope this guide has been useful and that you revive your solar lights to their full glory.