How To Attach Solar Screens To Windows

People over the years have tried several methods to keep the summer heat of the sun from blasting in through their windows. One of the most effective ways to make that happen is using solar screens to keep your home cool or protect your furniture from heat, these are the few advantages of attaching a solar screens to your window.
Such screens are equipped with a special kind of screen mesh, often made with polyester weave and sometimes with the added durability of PVC coating.
A solar screen is usually installed outside windows, but there can be several other ways of installing solar screens. These methods can either be proper or improper, and each one of them can have its positives and negatives.
Mounting Options For Solar Screens Installation
Windows come in different shapes and sizes. Installing the solar screen can thereby be a rather tricky task. The windows need to be measured accurately, and it needs to be ensured that the solar screen fits them perfectly. There are several different ways in which solar screens can be attached to the windows.
1. Using A 3M Dual Lock
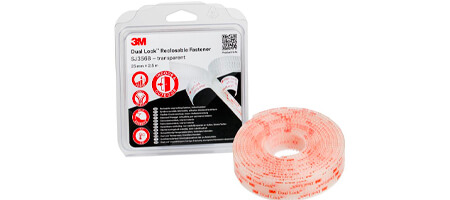
A 3M Dual lock is one of the most popular mounting options for solar screen installation. This option is widely known for its durability and acts like a double-sided tape that latches on to both the solar screen and the window.
It has been designed to last in the toughest of situations and can be separated and reunited as many times as you like.
Pros And Cons Of Using A 3M Dual Lock
Pros
- Suitable for all window types
- Can withstand extreme weather conditions
- Hidden from view
Cons
- Expensive
- It leaves a gap, so insects and dust can enter
2. Using Brick Clips
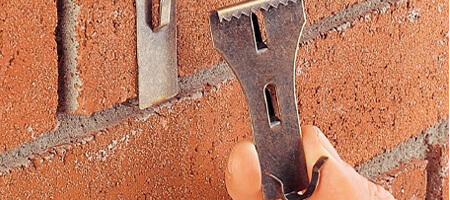
These are metallic clips and can be an excellent choice for securing the solar screen in place in houses made of bricks. It secures onto the edge of a solar screen, keeping it upright and stable at the same time.
One of the great things in the case of brick clips is that no modification is required in the windows or the solar screen. They can be removed easily and repositioned while keeping the solar screen firmly in its place.
Pros And Cons Of Brick Clips
Pros
- No drilling is required
- No need to alter the solar screen or the window
- Flexible
Cons
- Minor gaps in between the window and screen
- Only suitable for windows surrounded by bricks or stone
- Are not removed easily
3. Casement Clips
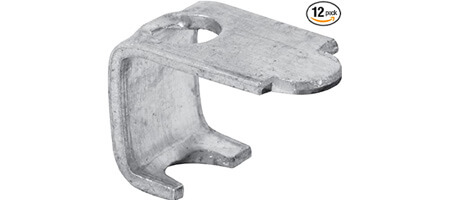
Casement clips are an ideal mounting option for most homes and can be screwed into the window to hold the solar screen securely. Since it drills directly into the window frame, it provides maximum stability.
Casement clips also allow easy cleaning since they have a knob and can easily be removed. These clips will come with hex-head screws, which are then drilled into the window.
Pros And Cons Of Casement Clips
Pros
- It can be installed easily
- Easily removable
- Reasonably priced
Cons
- Need to be drilled
- Leave holes in the windows
4. Screws
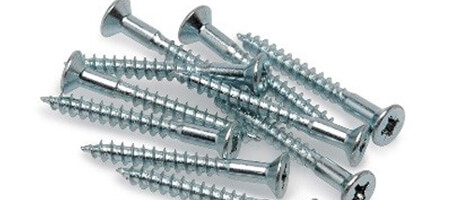
Another great mounting option is by using plain screws. For mounting on solar screens, heavy-duty screws are used. This ensures that the screws are secure even during tough weather situations.
The screws can be directly drilled into the solar screen or the window. They also leave no gaps and thereby prevent bugs and dust from entering.
Pros And Cons Of Screws
Pros
- Cover the window fully, leaving no gaps
- Compatible with most window types
Cons
- Requires drilling
- It cannot be easily removed
5. Leaf springs
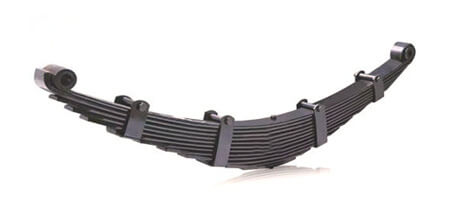
Leaf springs are curved metal springs used to secure a solar screen from one side. This requires specific windows that are not available at all homes but can be a suitable and effective option for suitable windows. They are also durable and can be removed easily for cleaning purposes.
Pros And Cons of Leaf Springs
Pros
- Cheap and durable
- It can be removed easily
- It covers the window fully
Cons
- Not suitable with all window types
6. Suction cups
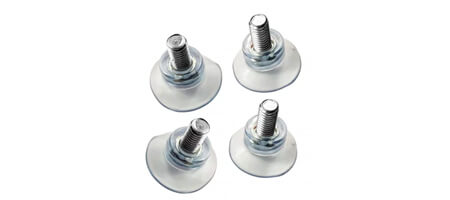
Suction cups are intended for solar screens mounted on the inside of the home rather than the outside. They are incredibly durable and can be a solid mounting option.
They provide an excellent way for the solar screen to be fastened and unfastened quickly onto the windows. They can be easily removed for cleaning purposes.
Pros And Cons Of Suction Cups
Pros
- Easily removable
- Durable
Cons
- Not suitable with all windows
How To Attach Solar Screens To Windows Using Barrel Clips
Barrel clips are one of the most popular mounting options for solar screens for installing them on the window’s exterior. The solar screen is mounted so that it leaves just enough space for the barrel clips to be drilled into the surrounding metal frame.
The screen is put into place after the barrel clips are secured. The clips are so turned that their flat part secures over the face of the screen frame. Each mounting screw needs to be checked to ensure that it is fit and should not be over tightened.
How To Attach Solar Screens To Windows Using Screws
1. Clean The Window
Before installing the solar screens, the windows should be cleaned thoroughly. Its surface should be clean and smooth for the sunscreen to function effectively. The windows can be cleaned through several methods, such as cleaning wipes, soap, and water or by spraying some cleaning spray or alcohol.
2. Check The Window Screw Location
The location of the screw to be put in the window needs to be determined. You must ensure that the screw can be put into the window frame without hitting the glass. The number of screws required to hold onto the solar screen and its positions needs to be determined.
3. Measure The Dimensions Of The Solar Screen
The solar screen’s width and length need to be measured by holding a measuring tape as straight as possible. The tape is put on the left side of the window and measured til the right. The width of the clearance needs to be subtracted from each side. The tolerance should not be measured too tight to allow insertion and removal.
The height is measured by putting the tape at the top and standing straight down. It needs to be determined where the screen should be at the top and the bottom.
4. Install The Solar Screen With Screws
Screws should then finally be drilled into the frame so that the corners of the solar screens are not affected. When a driver is attached to the drill, it is easier to install the screws in one easy step. Usually, four screws are required per window.
How To Install Solar Screen For Windows Using Casement Clips
Casement clips, also known as turn clips, are most suitable for mounting solar screens. They are metal clips that come with hex-head, self-tapping screws. The crews can be directly drilled into the window through the hole in the casement clip. The clips have tabs on them which can be grabbed using the fingers and then easily removed for cleaning and other purposes.
First, we need to make sure that there is enough room so that the screws can be put into the frame without hitting the glass. The location of the clips on the frame needs to be identified and marked. Then the width needs to be measured, and the clearance must be subtracted.
Next, the height is measured, which is the entire window frame from top to bottom. The crossbar support then needs to be measured, and it goes on the inside. Then after putting the solar screen loosely in place, the clips can be drilled.
Four casement clips are usually needed per solar screen. In the case of a larger screen, six are required. Casement clips work well with vinyl and aluminum windows and should be screwed on the outside edge of the window frame to ensure that the window glass is not cracked.
How To Install Solar Screens Using Leaf Clips
Leaf clips are used as a mounting method for solar screens in particular types of windows. They are thin, curved metal springs that are essentially placed on one side of the frame. Before installing the leaf clips, we need to ensure that we have a track at the top and bottom of the frame, where the solar screen can be wedged into.
The width needs to be measured from the inside edge of the recessed area on the left to the right. Height is measured from the top to the bottom lip of the frame, and a tape is to be kept straight at all times. Clearance needs to be subtracted from each side. The solar screen then needs to be assembled and inserted carefully.
Conclusion
Solar screens are an inexpensive and effective solution for keeping the heat out. There are several methods for installing solar screens, and it depends on the individual’s preference. Mounting a solar screen, however, requires a certain amount of precision. After analyzing all the options, a suitable mounting method should be chosen accordingly.


